Now that you’ve taken a quick tour of the AutoCAD, you’re ready to begin drawing! This chapter introduces you to some basic commands used in drawing with AutoCAD. The drawing tools are the tools which are used to create various shapes with the accurate dimension. Before starting this drawing you should re memorize the following instruction which used in designing.
1. Understood coordinate system
2. Learn about the basic like plan and elevation of a 3D object.
Starting the drawing tool > Line tool:
There are two methods to select any drawing tool in AutoCAD. First by select is from the quick access toolbar and second by using short key. We prefers second method because when the new version of any software is coming there is no change in short key but the place of the drawing tool bar may be changed. We will explain both methods you may choose by yourself.
Line tool:
Line tool is a tool by which we can create a line at any angle or at any path with accurate dimension. In AutoCAD there are three method of drawing line.
1. Absolute coordinate method:
This method used when we know the coordinate of the end point of a line with respect start point. To draw line from this method.
- Select line tool from the quick access or press L enter.
- Now specified first point coordinate of line by x,y and press enter. If you don’t have first point coordinate than take (0,0) as starting point or click anywhere in drawing window to get starting point.
- Now specified end point of line by x,y or @x,y and press enter. if you take x,y than it takes the coordinate by actual coordinate system and if you take @x,y than it takes your first point as the reference of this coordinate. Now if you want come out from command than press Esc key and if you don’t than proceed with next point.
Example:
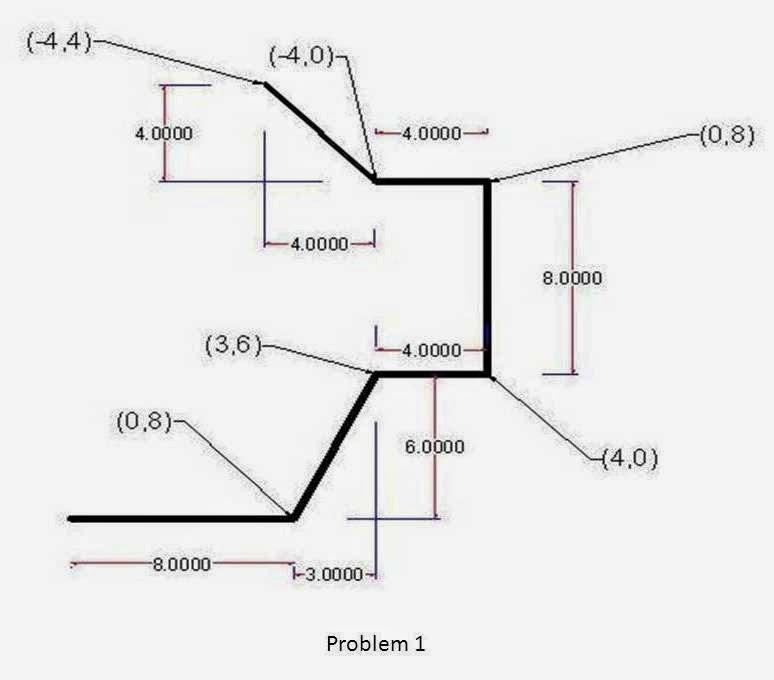
Draw the following diagram:
Solution:
L enter
@0,0
@8,0
@3,6
@4,0
@0,8
@-4,0
@-4,4
Esc.
2. Relative polar method:
This method is used to draw line when we know the length and anticlockwise angle of the line with respect to x axis. To draw line from this method
Select line tool from the quick access or press L enter.
- Now specified first point coordinate of line by x,y and press enter. If you don’t have first point coordinate than take (0,0) as starting point or click anywhere in drawing window to get starting point.
- Now to draw line by @distance<angle. It means if the distance of your line is 50 and the line make angle 145 with x axis in anticlockwise direction than you write @50,145.
- Now if you want to proceed than specified next distance and angle and if don’t press Esc.
Example:
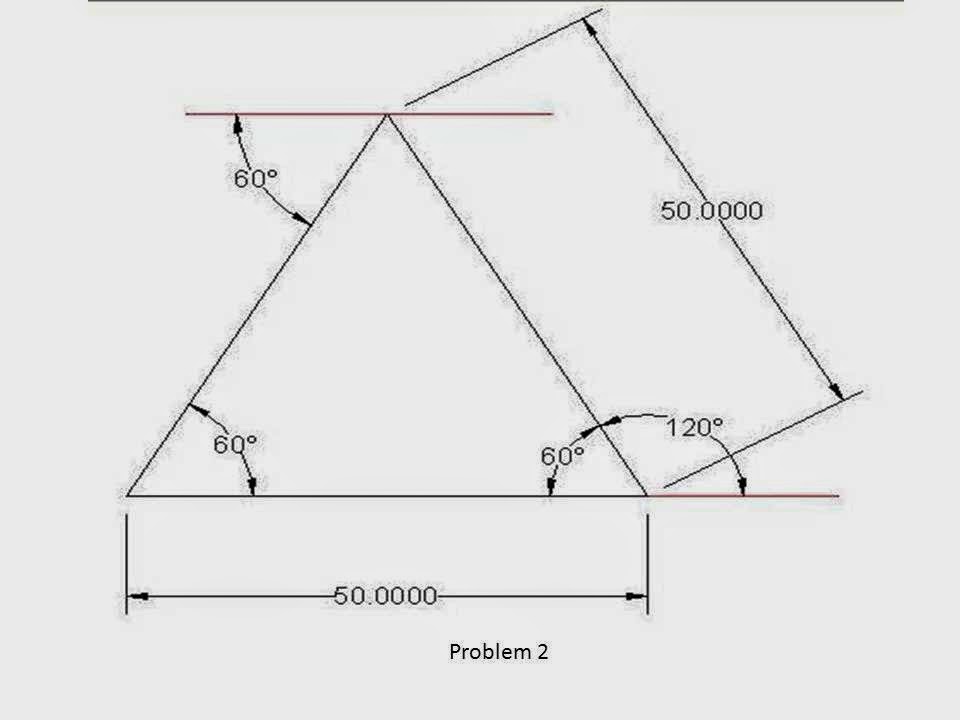
Draw the following diagram:
Solution:
L enter
@0,0
@50<0
@50<120
@50<240
Esc.
3. General ORTHO method:
This method is used when we know the length of the line and the line is make angle 0,90,180 or 240 degrees with x axis. In this method
On the ORTHO mode of drafting setting toolbar or by short key F8.
- Select line tool from the quick access or press L enter.
- Now specified first point coordinate of line by x,y and press enter. If you don’t have first point coordinate than take (0,0) as starting point or click anywhere in drawing window to get starting point.
- Now put the cursor of the mouse in the direction where the line extending and enter the value of distance and press enter.
Example:
Draw the following diagram:
Solution:
L enter
@0,0
50
20
30
10
20
10
Esc.
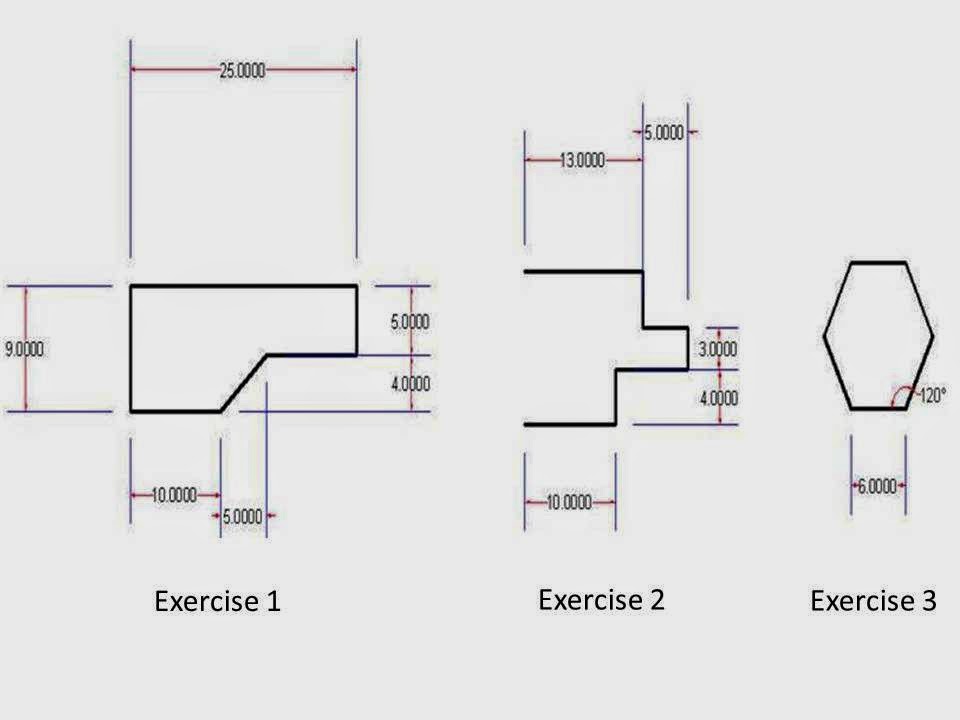
Exercise:
Draw the following diagram with suitable method-


